Getting started on Web
THEOplayer is the universal video player solution created by THEO Technologies. The THEOplayer HTML5/Tizen/webOS SDK offers support for HLS, MPEG-DASH, advertisements, DRM and much more.
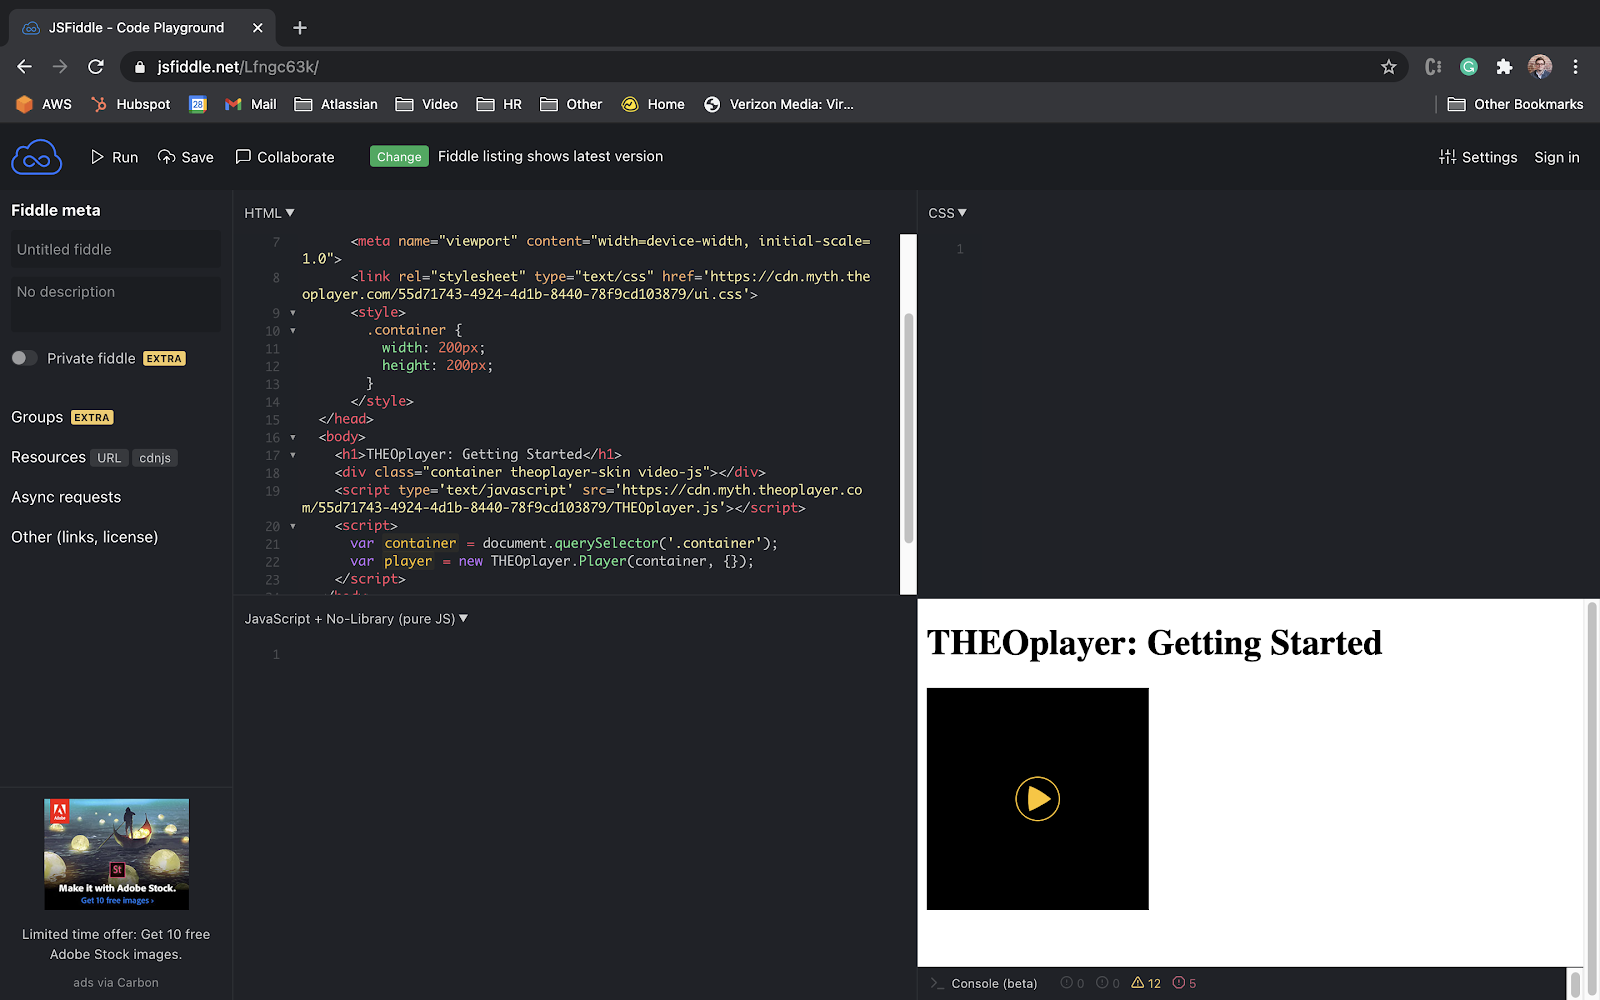
This article is your starting point if you are using THEOplayer for the first time. It takes you through the required steps to achieve a basic manual implementation of the THEOplayer SDK on Web. The outcome of this article is the template below.
<!doctype html>
<html lang="en">
  <head>
    <meta charset="UTF-8" />
    <title>THEOplayer</title>
    <meta name="viewport" content="width=device-width, initial-scale=1.0" />
    <link rel="stylesheet" type="text/css" href="SDK-LIBRARY-LOCATION/ui.css" />
  </head>
  <body>
    <div class="theoplayer-container video-js theoplayer-skin vjs-16-9"></div>
    <script src="SDK-LIBRARY-LOCATION/THEOplayer.js"></script>
    <script>
      var element = document.querySelector('.theoplayer-container');
      var player = new THEOplayer.Player(element, {
        libraryLocation: 'SDK-LIBRARY-LOCATION',
        license: 'YOUR-LICENSE-STRING',
      });
      player.source = {
        sources: [
          {
            src: '//cdn.theoplayer.com/video/star_wars_episode_vii-the_force_awakens_official_comic-con_2015_reel_(2015)/index.m3u8',
            type: 'application/x-mpegurl',
          },
        ],
      };
    </script>
  </body>
</html>
When copy-pasting the above code, make sure to replace the placeholders YOUR-LICENSE-STRING and SDK-LIBRARY-LOCATION
with your license and library location respectively. See below for more information.
Prerequisites
Before we can start using THEOplayer, you'll need a few things:
- A web server and domain name to host your code and provide access to viewers.
- A THEOplayer SDK and license to implement the THEOplayer library and access the THEOplayer API.
- A video stream (e.g. an
.m3u8or.mpdfile) to show to your viewers through the THEOplayer API.
Installing THEOplayer Web SDK
The THEOplayer Web SDK is available on npm: https://www.npmjs.com/package/theoplayer.
Installation can be done using your favorite package manager for Node (such as npm or yarn):
npm install theoplayer
You can also install a specific version instead:
npm install theoplayer@7.0.0
Different THEOplayer packages are available on npm with their own included features. Choose the package which best fits your requirements.
In the rest of the guide we reference SDK-LIBRARY-LOCATION which should become the path to the installed theoplayer package in your node modules, similar to: path/to/node_modules/theoplayer/.
We do recommend downloading the THEOplayer Web SDK through npm, but if you need a custom SDK with a different combination of features it is possible to create one on the Portal. Skip to Create an SDK through Portal for a detailed explanation.
Getting a THEOplayer License
Creating a Web SDK on the Portal can be achieved by the following steps:
Register and sign in
You register with your GitHub or Google account through the sign-in page, or complete the signup form. You sign in with your GitHub or Google account, or with your credentials, through the sign-in page.
Initiate license creation
On the THEOplayer Developer Portal dashboard, click the Create button in the licenses panel, as annotated with a red arrow in the following screenshot.

Alternatively, you create a license through the SDKs page.
- You click the SDKs item in the side navigation panel to navigate to the overview of your existing SDKs.
- The content panel of the SDKs page presents action buttons. Click the Create button to initiate the license creation process, as highlighted in the screenshot below.

Build, configure and publish license
Building your license involves three steps.
- Choose platform – Select the HTML5 icon highlighted with the red circle in the following screenshot. HTML5 applications (i.e. websites, progressive web apps) use the THEOplayer Web SDK.
- Configure license – Name the license and configure your domain whitelisting settings. The latter allows your license to only function for some websites and/or streams.
- Review and publish – Validate your configuration and click "Publish", or go back.

After you complete the third step, "Review and Publish", you will get your unique LICENSE which should replace YOUR-LICENSE-STRING in the examples.

Create an SDK through Portal
We recommend downloading the THEOplayer SDK through npm for most use cases. If you need an SDK with custom features, you can follow the next steps. Otherwise, skip to Basic setup.
Creating a Web SDK on the Portal can be achieved by the following steps:
Register and sign in to Portal
You register with your GitHub or Google account through the sign-in page, or complete the signup form. You sign in with your GitHub or Google account, or with your credentials, through the sign-in page.
Initiate SDK creation
To create an SDK through Portal similar steps should be followed as generating a license only. On the dashboard or in the SDKs menu, also click the Create button. Important here is to make sure you are on the CUSTOM tab as this will allow creating a custom SDK with a license instead of only a license.

Alternatively, when following the steps to generate only a license there will be redirect link to the steps for creating a custom THEOplayer SDK.

Build, configure and publish SDK
Building your Web SDK involves four steps.
- Choose platform – Select the HTML5 icon highlighted with the red circle in the following screenshot. HTML5 applications (i.e. websites, progressive web apps) use the THEOplayer Web SDK.
- Configure SDK – Name the SDK and configure your domain whitelisting settings. The latter allows you to restrict your SDK to only function on your own websites and/or streams.
- Select features – Enable certain features (e.g. HLS advertising) and disable others (e.g. Chromecast).
- Review and publish – Validate your configuration and click "Publish", or go back.

After you complete the fourth step, "Review and Publish", it'll take the portal a couple of minutes to generate your unique SDK. Once you see the Ready! button, as the screenshot below highlights with the red rectangle, you know that your SDK is available.

The following sections of this guide reference SDK-LIBRARY-LOCATION which should be replaced with the SDK library location URL.
Similarly, YOUR-LICENSE-STRING should be replaced with the LICENSE
Basic setup
Now, we're ready to set up THEOplayer on your website. This guide explains how you implement THEOplayer in four steps:
- We'll start from a basic HTML file, with no mention of THEOplayer.
- In the second step, we'll explain what the THEOplayer library is and how you can include it. We'll do the same for the default THEOplayer UI.
- In the third step, we'll describe how you play a video stream through THEOplayer.
- In the fourth step, we'll give a final overview.
Step 1: Set up an HTML file
When THEOplayer is used as a web video player, we will need a web page (i.e. HTML file) to embed THEOplayer and the code.
Note that a THEOplayer SDK license can only be used on whitelisted domains. You configure these domains when you create a THEOplayer license at https://portal.theoplayer.com.
Let's start with the following HTML file:
<!doctype html>
<html lang="en">
  <head>
    <meta charset="UTF-8" />
    <title>THEOplayer</title>
    <meta name="viewport" content="width=device-width, initial-scale=1.0" />
  </head>
  <body></body>
</html>
Next, we’ll include the THEOplayer SDK.
Step 2: Including the THEOplayer library
To access the THEOplayer API and default UI, you must first include the THEOplayer library files. The JavaScript library exposes the THEOplayer API and the CSS library contains the default UI.
The Open Video UI is our new Web UI. It provides component libraries for building a world-class video player experience powered by the THEOplayer SDK. See our Getting Started guide to start using the Open Video UI.
THEOplayer JavaScript library
In a previous step, we downloaded the THEOplayer npm package or created a custom THEOplayer SDK. Now we'll include it in our HTML file. There are two options for this:
-
Option 1: in your HTML
<script src="SDK-LIBRARY-LOCATION/THEOplayer.js"></script>

<!-- or if you only need the chromeless version (without UI) -->
<script src="SDK-LIBRARY-LOCATION/THEOplayer.chromeless.js"></script>
The
<script>tag can include an external JavaScript library on a web page. In this case we use it to include the THEOplayer library.The
srcattribute is the URI of the THEOplayer library that you wish to use. This could be something like:'SDK-LIBRARY-LOCATION/THEOplayer.js', where the URL is a link to your THEOplayer.js file. -
Option 2: in your JavaScript
import * as THEOplayer from 'theoplayer';

// or if you only need the chromeless version (without UI):
import * as THEOplayer from 'theoplayer/chromeless';
Legacy browser supportStarting with THEOplayer 6.0, this will import a JavaScript module targeting modern browsers, using modern JavaScript syntax such as
async/await. If you need to support older browsers (such as older smart TVs), then you'll need to use option 1 instead as this creates a globalTHEOplayervariable that exposes the full API.
THEOplayer CSS library
To use the default THEOplayer UI, you need to reference the THEOplayer CSS library:
<link rel="stylesheet" type="text/css" href="SDK-LIBRARY-LOCATION/ui.css" />
The <link> tag includes a CSS file on a web page.
Similar to the JavaScript library, you must swap SDK-LIBRARY-LOCATION with your actual library location.
Next, we’ll create a THEOplayer instance and configure a video stream.
Step 3: The video
To play a video through the THEOplayer Web SDK, you must:
- Create a video player container element.
- Retrieve a reference to this container through JavaScript.
- Create a THEOplayer instance associated with that container.
- Configure a video stream for this instance.
The snippet below implements these 4 steps:
<div class="theoplayer-container video-js theoplayer-skin vjs-16-9"></div>
<script src="SDK-LIBRARY-LOCATION/THEOplayer.js"></script>
<script>
  // Retrieve the THEOplayer container div
  var element = document.querySelector('.theoplayer-container');

  // Create the video player
  var player = new THEOplayer.Player(element, {
    libraryLocation: 'SDK-LIBRARY-LOCATION', // references folder containing your THEOplayer library files (theoplayer.p.js, THEOplayer.js, ...)
    license: 'YOUR-LICENSE-STRING', // references your THEOplayer SDK license
  });

  // HLS
  player.source = {
    sources: [
      {
        src: '//cdn.theoplayer.com/video/star_wars_episode_vii-the_force_awakens_official_comic-con_2015_reel_(2015)/index.m3u8', // sets HLS source
        type: 'application/x-mpegurl', // sets type to HLS
      },
    ],
  };

  // DASH
  // player.source = {
  //   sources: [
  //     {
  //       src: '//cdn.theoplayer.com/video/cosmos/cmaf.mpd', // sets DASH source
  //       type: 'application/dash+xml', // sets type to MPEG-DASH
  //     },
  //   ],
  // };
</script>
Let's break down the above snippet.
Create video player container
This <div> element creates a video player container.
<div class="theoplayer-container video-js theoplayer-skin vjs-16-9"></div>
- The
theoplayer-containerclass is used to fetch the container through JavaScript, as demonstrated by the snippet below. - The
video-js theoplayer-skin vjs-16-9classes load the default THEOplayer UI. You may omitvjs-16-9if you don't want a 16:9 container.
Setting the size of the container
There are other approaches to setting the size of your container instead of using vjs-16-9.
For example, you could omit the vjs-16-9 class, and instead configure the width and height of container class through CSS.
.theoplayer-container {
    width: 200px;
    height: 200px;
}
Alternatively, you set your container to be responsive to its parent node by setting fluid: true in your configuration,
as demonstrated by the following screenshot.
var player = new THEOplayer.Player(element, {
    fluid: true
    // ...other options go here
});

There is no wrong or right. It's up to you to decide which approach is best for your use-case.
var element = document.querySelector('.theoplayer-container');
Create THEOplayer instance
The snippet below creates a THEOplayer instance for a container with a specific Player Configuration.
var player = new THEOplayer.Player(element, {
  // instantiates the video player
  libraryLocation: 'SDK-LIBRARY-LOCATION', // references folder containing your THEOplayer library files (theoplayer.p.js, THEOplayer.js, ...)
  license: 'YOUR-LICENSE-STRING', // references your THEOplayer SDK license
});
Similar to the JavaScript and CSS library, you must swap out SDK-LIBRARY-LOCATION and YOUR-LICENSE-STRING.
You can read more about configuring the license at the License section.
Configure video stream
The snippet below configures a HLS video stream for the THEOplayer instance.
player.source = {
  sources: [
    {
      src: '//cdn.theoplayer.com/video/star_wars_episode_vii-the_force_awakens_official_comic-con_2015_reel_(2015)/index.m3u8', // sets HLS source
      type: 'application/x-mpegurl', // sets type to HLS
    },
  ],
};
To configure a DASH stream instead,
you must set type to 'application/dash+xml' instead of 'application/x-mpegurl',
as demonstrated by commented out code in one of the earlier snippets.
In the next step we'll put everything together.
Step 4: The result
Use the snippet below on your web server.
<!doctype html>
<html lang="en">
  <head>
    <meta charset="UTF-8" />
    <title>THEOplayer</title>
    <meta name="viewport" content="width=device-width, initial-scale=1.0" />
    <link rel="stylesheet" type="text/css" href="SDK-LIBRARY-LOCATION/ui.css" />
  </head>
  <body>
    <div class="theoplayer-container video-js theoplayer-skin vjs-16-9"></div>
    <script src="SDK-LIBRARY-LOCATION/THEOplayer.js"></script>
    <script>
      var element = document.querySelector('.theoplayer-container');
      var player = new THEOplayer.Player(element, {
        libraryLocation: 'SDK-LIBRARY-LOCATION',
        license: 'YOUR-LICENSE-STRING',
      });
      player.source = {
        sources: [
          {
            src: '//cdn.theoplayer.com/video/star_wars_episode_vii-the_force_awakens_official_comic-con_2015_reel_(2015)/index.m3u8',
            type: 'application/x-mpegurl',
          },
        ],
      };
    </script>
  </body>
</html>
Bundler setup
When using a bundler
such as Webpack, Rollup, Vite or Parcel
you may need some additional configuration to make your bundler copy all files needed by the THEOplayer Web SDK
and set your libraryLocation correctly.
If you prefer starting from a fully working example rather than copy-pasting these snippets into your code, check out our examples on GitHub!
What is a libraryLocation?
The THEOplayer Web SDK uses Web Workers to off-load several CPU-intensive tasks to a separate worker thread. By moving these tasks off the main thread, THEOplayer ensures that your app remains fast and responsive.
The code for these workers is located in separate JavaScript files, outside the main THEOplayer library. The THEOplayer Web SDK ships with several of these files, such as:
THEOplayer.transmux.js: responsible for transmuxing MPEG-TS and AAC files to fragmented MP4.theoplayer.d.js: responsible for decrypting HLS segments encrypted with full-segment AES-128 encryption.
Additionally, some of these workers leverage WebAssembly for improved performance:
THEOplayer.transmux.wasm: the WebAssembly binary for transmuxing MPEG-TS and AAC files.
These files need to be hosted on your app's server, so the main THEOplayer library can locate and load them when needed.
You tell THEOplayer where you put those files by setting the libraryLocation in your player configuration.
JavaScript bundlers work by traversing your app's dependencies through import or require() statements in your source code.
As such, they can't auto-magically detect that THEOplayer needs these extra files, since they are never directly imported.
You'll need to configure your bundler to also copy these extra files to your app's output directory.
Webpack
Use copy-webpack-plugin to copy the THEOplayer files
to the output directory.
const CopyPlugin = require('copy-webpack-plugin');

module.exports = {
  entry: './src/index.js',
  output: {
    filename: 'bundle.js',
    path: __dirname + '/dist',
  },
  plugins: [
    new CopyPlugin({
      patterns: [
        {
          context: 'node_modules/theoplayer/',
          from: './*.(css|js|html|wasm)',
          info: { minimized: true },
          to: 'vendor/theoplayer/',
        },
      ],
    }),
  ],
};
Then, configure your library location:
import * as THEOplayer from 'theoplayer';

var player = new THEOplayer.Player(element, {
  libraryLocation: '/vendor/theoplayer/',
  license: 'YOUR-LICENSE-STRING',
});
Rollup
Use rollup-plugin-copy to copy the THEOplayer files
to the output directory.
import copy from 'rollup-plugin-copy';

export default {
  input: {
    bundle: './src/index.js',
  },
  output: {
    dir: './dist',
  },
  plugins: [
    copy({
      targets: [
        {
          src: './node_modules/theoplayer/*.(js|css|html|wasm)',
          dest: './dist/vendor/theoplayer',
        },
      ],
    }),
  ],
};
Then, configure your library location:
import * as THEOplayer from 'theoplayer';

var player = new THEOplayer.Player(element, {
  libraryLocation: '/vendor/theoplayer/',
  license: 'YOUR-LICENSE-STRING',
});
Vite
Use vite-plugin-static-copy to copy the THEOplayer files
to the output directory.
import { defineConfig } from 'vite';
import { viteStaticCopy } from 'vite-plugin-static-copy';

export default defineConfig({
  plugins: [
    viteStaticCopy({
      targets: [
        {
          src: 'node_modules/theoplayer/*.(css|js|html|wasm)',
          dest: 'vendor/theoplayer/',
        },
      ],
    }),
  ],
});
Then, configure your library location:
import * as THEOplayer from 'theoplayer';

var player = new THEOplayer.Player(element, {
  libraryLocation: `${import.meta.env.BASE_URL}vendor/theoplayer/`,
  license: 'YOUR-LICENSE-STRING',
});
Parcel
Use parcel-reporter-static-files-copy
to copy the THEOplayer files to the output directory.
{
  "extends": ["@parcel/config-default"],
  "reporters": ["...", "parcel-reporter-static-files-copy"]
}
{
  "name": "my-app",
  "staticFiles": {
    "staticPath": "node_modules/theoplayer/",
    "distDir": "dist/vendor/theoplayer/"
  }
}
Then, configure your library location:
import * as THEOplayer from 'theoplayer';

var player = new THEOplayer.Player(element, {
  libraryLocation: '/vendor/theoplayer/',
  license: 'YOUR-LICENSE-STRING',
});
Next steps
Ready to learn more?
- Go through our how-to guides to learn about UI customization, advertising, DRM, casting, analytics and other topics.
- Check out our API reference.
- Try out samples from our GitHub.